
Introduction: Difference between revisions
Created page with "alt=Sample computer setup GUI|thumb|Sample computer setup GUI To get started, simply place down a Computer of any tier and place a Screen of any tier on top (although any side would work). Then open the computer's GUI and place a Mainboard, a Hard Disk Drive (optional) and an Advanced OS installation Floppy Disk (craftable by combining a normal floppy with a regular book in a crafting table). Next, simply press..." |
No edit summary |
||
| Line 2: | Line 2: | ||
To get started, simply place down a [[Computer]] of any tier and place a [[Screen]] of any tier on top (although any side would work). Then open the computer's GUI and place a [[Mainboard]], a [[Hard Disk Drive]] (optional) and an Advanced OS installation [[Floppy Disk]] (craftable by combining a normal floppy with a regular book in a crafting table). | To get started, simply place down a [[Computer]] of any tier and place a [[Screen]] of any tier on top (although any side would work). Then open the computer's GUI and place a [[Mainboard]], a [[Hard Disk Drive]] (optional) and an Advanced OS installation [[Floppy Disk]] (craftable by combining a normal floppy with a regular book in a crafting table). | ||
Next, simply press the power button in the GUI, or shift-rightclick the computer with an empty hand. This will make the computer's run state indicator change color to green and display text on the screen.<gallery> | Next, simply press the power button in the GUI, or shift-rightclick the computer with an empty hand. This will make the computer's run state indicator change color to green and display text on the screen.<gallery mode="nolines"> | ||
File:Introduction computer setup.png|Sample computer setup unstarted | File:Introduction computer setup.png|Sample computer setup unstarted | ||
File:Sample computer setup running.png|Sample computer setup running | File:Sample computer setup running.png|Sample computer setup running | ||
</gallery> | </gallery> | ||
Revision as of 12:11, 18 August 2026

To get started, simply place down a Computer of any tier and place a Screen of any tier on top (although any side would work). Then open the computer's GUI and place a Mainboard, a Hard Disk Drive (optional) and an Advanced OS installation Floppy Disk (craftable by combining a normal floppy with a regular book in a crafting table).
Next, simply press the power button in the GUI, or shift-rightclick the computer with an empty hand. This will make the computer's run state indicator change color to green and display text on the screen.
-
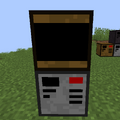 Sample computer setup unstarted
 -
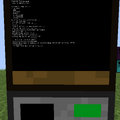 Sample computer setup running

